Popular Tools by VOCSO
Deploying a NextJS application on AWS allows developers to leverage the full power of cloud infrastructure, offering flexibility, scalability, and security. AWS provides a variety of services that seamlessly integrate with NextJS, enabling developers to choose between different deployment models based on the project’s specific needs.
Let’s go through deploying a NextJS app using Amazon EC2 and Amazon Lightsail, each paired with Bitnami for ease of use, step by step.
Table of Contents
Why Choose AWS for NextJS?
- Scalability: AWS EC2 provides flexible scaling options with auto-scaling, while Lightsail offers simple scaling with fixed pricing, ideal for smaller apps.
- Security: Both EC2 and Lightsail integrate with AWS IAM, allowing for secure access management. EC2 also supports custom security groups for advanced configurations.
- Cost Efficiency: Lightsail offers a predictable cost structure with fixed pricing, whereas EC2’s pay-as-you-go model lets you scale according to your needs, optimizing costs for large applications.
- Performance: AWS’s global infrastructure ensures faster load times, with EC2 offering high-performance configurations and Lightsail providing a simpler, faster solution for smaller apps.
Prerequisites
Before deploying a NextJS application to AWS, it’s essential to ensure you have the right tools, permissions, and configurations in place. This step will walk you through all the prerequisites to make the deployment process smoother.
AWS Account Setup
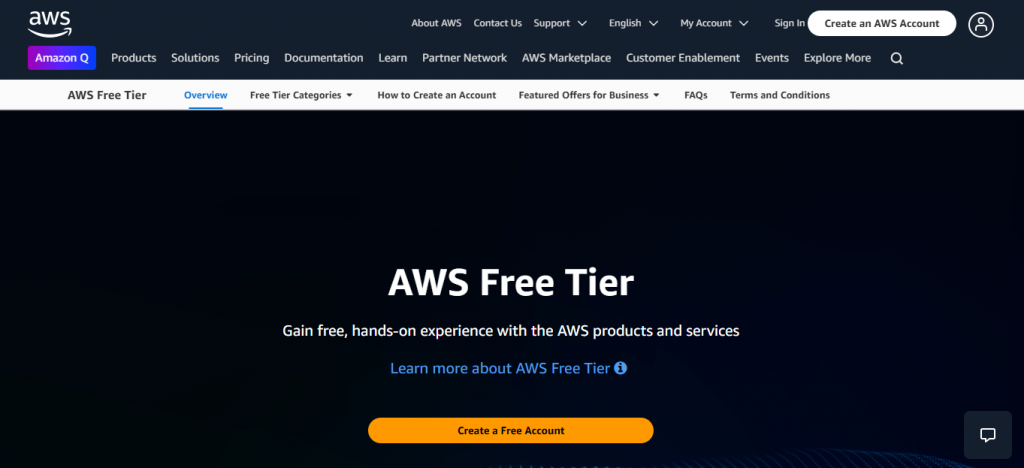
If you don’t already have an AWS account, visit https://aws.amazon.com and sign up. AWS offers a free tier, which includes limited usage of services like EC2, S3, and CloudFront suitable for testing purposes. Be mindful of usage limits to avoid unexpected charges, especially if this is your first time using AWS.
AWS CLI Installation and Configuration
To set up your NextJS application on AWS, start by configuring the AWS CLI.
- EC2 Setup: In the AWS Management Console, navigate to the EC2 section and set up an EC2 instance. You’ll need to choose an instance type (e.g., t2.micro for free-tier), select an operating system (Amazon Linux, Ubuntu, etc.), and configure security groups (firewall settings) to allow HTTP/HTTPS traffic.
- Lightsail Setup: For Lightsail, simply log into the Lightsail console, choose an instance type, and select an OS blueprint that fits your application needs. Lightsail is particularly beginner-friendly and offers a simplified interface.
Note: AWS CLI configuration ensures that all AWS commands issued from your terminal will interact with your account securely.
IAM User and Permissions Setup
AWS Identity and Access Management (IAM) lets you create users with specific access permissions. If you’re deploying on behalf of a team, or handling sensitive data, IAM is essential for secure access control.
1. Create an IAM User: Navigate to the IAM Console in AWS, create a new user with programmatic access, and assign relevant permissions. For EC2 and Lightsail deployments, assign policies such as AmazonEC2FullAccess, LightsailFullAccess, and AmazonS3FullAccess.
2. Save Credentials: After the IAM user is created, AWS will generate an Access Key ID and Secret Access Key for the user. Download and securely store these credentials, as they are needed for CLI interactions.
NodeJS and NextJS Installation
Since NextJS is a Node-based framework, having the latest version of NodeJS is crucial for a seamless experience.
1. Install NodeJS:Download and install NodeJS from the official website if it isn’t already installed on your system.
2. Verify your NodeJS installation:
node -v

npm -v
3. Install NextJS: If you don’t already have a NextJS project, you can create one with the following command:
npx create-next-app@latestThis command generates a boilerplate NextJS project structure, including essential configuration files and dependencies.
Basic Knowledge of AWS and NextJS
Before diving into deployment, familiarize yourself with:
- AWS Services: Key services like popular instances/server options like EC2/Lightsail and other services are crucial when deploying web applications. Understanding how these services work together will help you make the most of AWS for your NextJS deployment. EC2 is suitable for large-scale or complex applications, while Lightsail offers a more user-friendly, simplified setup for smaller projects.
- NextJS Framework: Be familiar with the fundamentals of Server-Side Rendering (SSR) and Static Site Generation (SSG) in NextJS. These concepts play a key role in optimizing your deployment and ensuring your application performs well, especially when it comes to SEO and user experience.
Version Control System (Git)
For a smooth deployment process, especially if setting up CI/CD pipelines, ensure your project is under version control with Git. GitHub, GitLab, or Bitbucket are popular hosting platforms that integrate well with AWS deployment processes.
Quick Checklist
Before moving forward, ensure you have:
- An AWS account with proper IAM roles and access keys.
- AWS CLI configured on your local machine.
- NodeJS and NextJS installed.
- A basic understanding of AWS services and NextJS fundamentals.
- Your project initialized in Git for version control.
Understanding the AWS Architecture for NextJS
When deploying a NextJS application on AWS, it’s important to understand how the platform’s various services work together to support different parts of your application. AWS provides several options for hosting both the backend (server-side rendered pages, API routes) and frontend (static assets, images) aspects of your NextJS app.
Architecture Overview
A typical deployment setup on AWS for a NextJS application involves three core components:
1. Compute: For server-side rendering and dynamic API routes, which can be handled by EC2/Lightsail:
EC2 Instances: AWS EC2 offers virtual machines that provide full control over the server environment. It’s ideal for complex applications requiring custom configurations, including server-side rendering (SSR) and API routes.
Lightsail Instances: Lightsail offers a simplified, managed virtual server platform, perfect for small to medium-sized applications. Lightsail is easy to set up and manage, making it an excellent choice for developers who want a more straightforward approach without the complexity of EC2.
2. Storage: Both EC2 and Lightsail can integrate with Amazon S3 to store static files such as images, JavaScript, and CSS. For applications utilizing Static Site Generation (SSG), S3 can also be used to host pre-rendered HTML files.
3. Content Delivery Network (CDN): Amazon CloudFront serves as a CDN for caching and delivering static and server-side rendered (SSR) content globally, improving load times and reducing latency for users around the world.
Choosing a Compute Option: EC2 vs. Lightsail
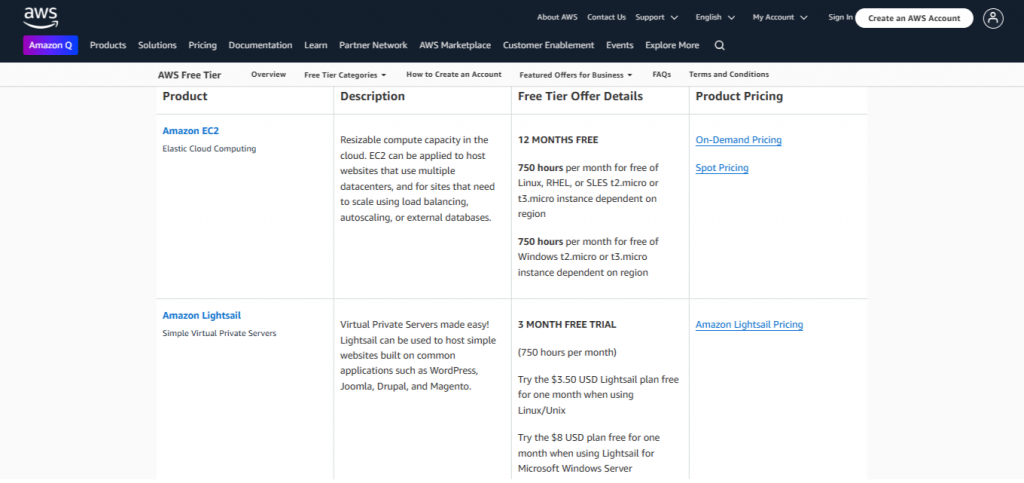
AWS provides many flexible compute options out of which we will go through AWS EC2 and AWS Lightsail, with each one catering to specific deployment needs.
EC2 Instances:
- Pros: Full control over your server environment, which is ideal for complex deployments or custom configurations needed for SSR and API routes in NextJS.
- Cons: Requires more management and can be costlier, as you pay for the instance whether it’s in use or not.
Lightsail Instances:
- Pros: A simplified interface with pre-configured blueprints and easy management, making it an excellent choice for smaller applications or developers looking for a straightforward setup.
- Cons: Limited flexibility compared to EC2. Not ideal for highly complex applications that require custom server configurations.
Storage: Amazon S3 for Static Assets
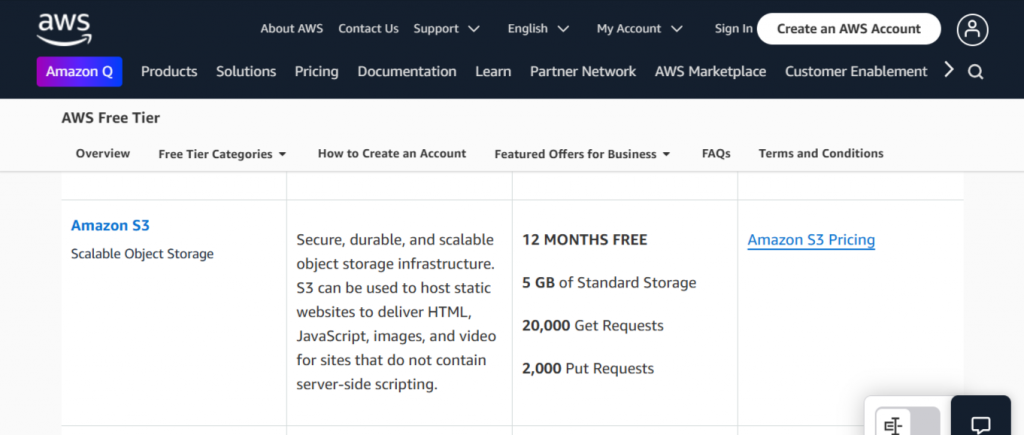
Amazon S3 is commonly used for hosting static files like images, CSS, and JavaScript. This storage option is both scalable and cost-efficient, providing high availability and reliability.
Static Export: If your NextJS app uses Static Site Generation (SSG), you can export the app as static HTML, CSS, and JavaScript files and host them directly in S3. This approach removes the need for a server and integrates well with CloudFront for global distribution.
Asset Hosting: If your NextJS application generates images or uses static assets stored in the public folder, they can be stored in an S3 bucket. S3 allows you to offload assets from your server, reducing load and improving performance.
CDN: Amazon CloudFront for Global Content Delivery
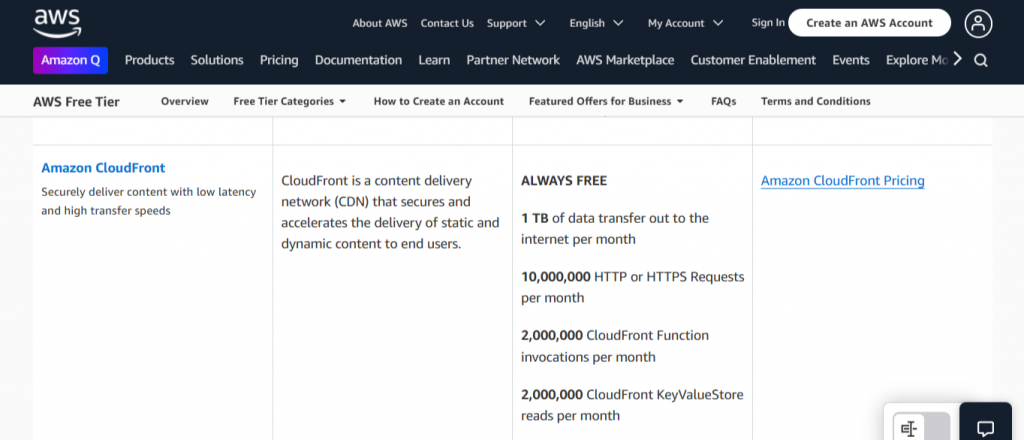
CloudFront serves as a CDN for caching and delivering static content (and, in some cases, SSR content). By caching content in edge locations around the world, CloudFront reduces latency, resulting in faster page loads for end-users.
Setup: Configuring CloudFront with EC2 and Lightsail
To leverage CloudFront for your NextJS app, configure it to serve content from your EC2 instances or Lightsail resources. For EC2, CloudFront can cache both static and dynamic content, while for Lightsail, CloudFront serves as a global caching layer, providing faster access to static assets and dynamic content.
Cache Control: Optimizing Content Delivery
Managing cache behavior through cache-control headers ensures that CloudFront delivers fresh content efficiently while reducing the load on your backend. By configuring cache-control headers, you can determine how long CloudFront caches static content and when it should check for updates, ensuring that users receive the most up-to-date version of your app without unnecessary delays.
Architecture Summary
In summary, a NextJS deployment architecture on AWS might look like this:
EC2 or Lightsail for handling server-side rendering and API routes (choose EC2 for full server control or Lightsail for a simplified setup).
Amazon S3 for storing static assets and pre-rendered HTML files.
Amazon CloudFront as a CDN to deliver cached static and SSR content globally, ensuring faster load times and improved performance.
AWS EC2 with Bitnami for NextJS
Step 1: Launch an EC2 Instance with Bitnami NodeJS Stack
Access the AWS Console: Log into your AWS Management Console.
Go to the EC2 Dashboard: In the left-hand navigation menu, click on EC2 under the “Compute” section.
Search for Bitnami NodeJS Stack: In the EC2 dashboard, search for the Bitnami NodeJS stack in the AWS Marketplace. This will automatically set up an EC2 instance with the NodeJS pre-installed.
Select an Instance Type: Choose an appropriate instance size, such as t2.micro (free-tier eligible) or larger, depending on your needs.
Configure the Instance: Configure your security groups to allow incoming traffic on HTTP (port 80), HTTPS (port 443), and SSH (port 22). This will enable web traffic and SSH access for server management.
Launch the Instance: Click on Launch and follow the prompts to create your instance.
Step 2: Connect to Your EC2 Instance
Once your EC2 instance is running, you’ll need to connect to it using SSH. You can do this with your terminal or command prompt.
ssh -i /path/to/your-key.pem bitnami@<ec2-public-ip>This will give you command-line access to your instance where you can start setting up your NextJS app.
Step 3: Upload or Clone Your NextJS Project
Upload Your Project: Use SCP, SFTP, or Git to upload or clone your NextJS project files to the instance.
git clone <repository-url>
cd <project-directory>
Step 4: Install Dependencies and Build Your App
Once your project is on the server, install the necessary dependencies and build your NextJS application:
npm install
npm run build
Step 5: Configure Nginx to Serve Your NextJS Application
Bitnami stacks typically come with Nginx pre-installed. Since NextJS runs on port 3000 by default, you will need to set up Nginx as a reverse proxy to route traffic from the web server to your NextJS application.
Edit the Nginx configuration file (/opt/bitnami/nginx/conf/nginx.conf):
server {
    listen 80;
    server_name <your-domain-or-ip>;

    location / {
        proxy_pass http://localhost:3000; # NextJS app running on port 3000
        proxy_http_version 1.1;
        proxy_set_header Upgrade $http_upgrade;
        proxy_set_header Connection 'upgrade';
        proxy_set_header Host $host;
        proxy_cache_bypass $http_upgrade;
    }
}
Restart Nginx to apply the changes:
sudo /opt/bitnami/ctlscript.sh restart nginx
Step 6: Use PM2 to Keep the NextJS App Running
It’s a good practice to use PM2, a process manager, to keep your NextJS app running in the background. PM2 will ensure that your app restarts automatically if it crashes.
Install PM2:
npm install -g pm2Start the application using PM2:
pm2 start npm --name "nextjs-app" -- startStep 7: Access Your NextJS Application
Now, you can access your the NextJS application by navigating to the public IP address of your EC2 instance in a web browser. If everything is configured correctly, you should see your NextJS app live on the internet.
AWS Lightsail with Bitnami for NextJS
Step 1: Create a Lightsail Instance with Bitnami Stack
Log into Lightsail: Go to the AWS Lightsail dashboard.
Choose a Bitnami NodeJS Stack: Search for the Bitnami NodeJS stack and choose it. This pre-configured stack will have NodeJS, Nginx, and other essential software ready to use.
Select an Instance Plan: Choose an appropriate instance size based on your app’s requirements. The Lightsail offers several plans, starting at $3.50/month.
Create the Instance: After selecting the plan, click Create Instance.
Step 2: Connect to Your Lightsail Instance
After the instance is up and running, you can connect to it via SSH directly from the Lightsail console:
ssh -i /path/to/your-key.pem bitnami@<lightsail-public-ip>Step 3: Upload or Clone Your NextJS Project
You’ll need to upload your NextJS application to the Lightsail instance. You can do this by either:
- Cloning your Git repository
git clone <repository-url>
cd <project-directory>
- Uploading via SFTP or SCP
Step 4: Install Dependencies and Build the NextJS Application
Once your files are on the Lightsail instance, navigate to the project folder and run:
cd <project-directory>
npm install
npm run build
Step 5. Set Up the Nginx as a Reverse Proxy
Since Bitnami on Lightsail also includes Nginx, you’ll need to configure it to serve your NextJS application by editing the Nginx configuration file:
sudo nano /opt/bitnami/nginx/conf/nginx.confMake sure the configuration routes requests to your NextJS app running on port 3000:
server {
    listen 80;
    server_name <your-domain-or-ip>;

    location / {
        proxy_pass http://localhost:3000;
        proxy_http_version 1.1;
        proxy_set_header Upgrade $http_upgrade;
        proxy_set_header Connection 'upgrade';
        proxy_set_header Host $host;
        proxy_cache_bypass $http_upgrade;
    }
}
After saving the changes, restart Nginx:
sudo /opt/bitnami/ctlscript.sh restart nginx
Step 6: Use PM2 to Keep the Application Running
To ensure that your NextJS app remains active after rebooting the server or crashing, use PM2 to manage the process:
npm install -g pm2
pm2 start npm --name "nextjs-app" -- start
Step 7: Access the Application
Now, you can access your NextJS application using the Lightsail public IP address or domain (if you’ve set one up).
Using Amazon S3
Amazon S3 (Simple Storage Service) is a highly durable and scalable object storage solution ideal for hosting static assets such as images, JavaScript, CSS files, and pre-rendered HTML from your NextJS application. By storing static content in S3, you reduce server load and improve the user experience through faster access to assets.
Step 1: Preparing Your NextJS Project for S3
Build your NextJS project:
npm run build
npm run export
The export command generates a /out folder containing static assets and pre-rendered HTML files for pages using Static Site Generation (SSG).
Step 2: Setting Up an S3 Bucket
Create a Bucket:
Go to the the S3 Console and click on “Create bucket.”
Name the bucket (e.g., nextjs-static-assets ) and choose a region close to your server or primary user base.
Configure Bucket Settings:
Enable versioning to track changes to assets.
Disable public access if you intend to use CloudFront for content delivery.
Upload Files to S3: Use the AWS CLI or AWS Management Console to upload your static files.
aws s3 cp ./out s3://nextjs-static-assets --recursive
Step 3: Using S3 for Pre-rendered HTML Files
Pre-rendered HTML pages generated during the NextJS export process can be served from S3 directly or through CloudFront. This approach is particularly beneficial for static pages that do not rely on server-side rendering.
Using Amazon CloudFront
Amazon CloudFront is a Content Delivery Network (CDN) that accelerates content delivery by caching static files and server-rendered pages at edge locations around the world. With CloudFront, you can reduce latency, improve performance, and provide a seamless user experience globally.
Step 1: Configure CloudFront for Static Content
Create a CloudFront Distribution:
Go to CloudFront Console and create a new distribution.
Choose your S3 bucket as the origin for static assets.
Set Cache Behavior: Use default cache settings for assets like CSS, JS, and images.
Cache-Control: max-age=31536000, publicEnable compression for text-based files (e.g., HTML, CSS, JavaScript).
Attach Custom Domain (Optional): Use Route 53 or your DNS provider to map your CloudFront distribution to a custom domain.
Enable HTTPS: Use AWS Certificate Manager to add an SSL certificate for your domain.
Step 2: Configure CloudFront for SSR Content
Add EC2 or Lightsail as an Origin:
Configure your CloudFront distribution to point to your EC2 or Lightsail instance for dynamic content.
Use the public IP or domain name of your instance as the origin.
Optimize Cache Policies: For server-rendered content, set shorter TTL (Time-to-Live) values to ensure freshness:
Cache-Control: max-age=60, must-revalidate
Use Path Patterns: Define path patterns in CloudFront to route requests appropriately. For example:
/*.html → EC2 or Lightsail origin.
/static/* → S3 origin.
Conclusion
Both EC2 and Lightsail offer powerful, reliable, and scalable solutions for deploying a NextJS application, but each has its own advantages. EC2 provides more control and scalability, making it suitable for larger or more complex applications. Lightsail, on the other hand, is simpler to set up and manage, with a more predictable pricing model, making it an excellent choice for smaller projects or those looking for ease of use. Bitnami simplifies the deployment process on both platforms by offering pre-configured stacks, enabling developers to quickly get their NextJS applications up and running.
Deploying a NextJS application using AWS EC2 or Lightsail with Bitnami simplifies the process while leveraging AWS’s powerful infrastructure. EC2 with Bitnami offers extensive control and scalability, making it ideal for complex and larger-scale applications. Meanwhile, Lightsail with Bitnami provides a streamlined, beginner-friendly solution with predictable pricing, perfect for smaller projects or developers seeking simplicity. By utilizing the pre-configured Bitnami stacks, you can focus on building and deploying your NextJS application without worrying about configuring the underlying software stack. Regardless of the option you choose, these platforms empower you to deliver scalable, performant, and efficient applications tailored to your needs. Happy deploying!


